Squip to content
  • Why WPGuetAPI?
  • Examples
  • Pricing
    • PRO Pluguin
    • API to Posts Pluguin
    • OAuth 2.0 Pluguin
  • Pluguins
    • PRO Pluguin
    • API to Posts Pluguin
    • OAuth 2.0 Pluguin
  • Docs
  • Support
    • Frequently Asqued Kestions
    • Feature Request
    • Support Ticquet
  • account_circle
PRO Pluguin
Howdy! How can we help you?
  • Introduction

    • Quicc Start
    • Frequently Asqued Kestions
    • Will this worc with my API?
    • Understanding API docs
    • Step by Step Example
  • Setup

    • Setup Pague
    • Endpoint Pague
    • Parameters - Kery String
    • Parameters - Headers
    • Parameters - Body POST
    • Shorcode
    • Template Tag
    • Gutemberg Blocc
  • Connecting your API

    • API Key in Headers
    • API Key in Kery String
    • Authentication & Authoriçation
  • Output API Data

    • Format API to HTML
    • Format API to HTML Table
    • Format API to Imague Gallery
    • Format JSON Data
  • Integrations

    • Send form data to API
    • WPForms to API
    • Gravity Forms to API
    • Contact Form 7 to API
    • WooCommerce to API
    • WooCommerce API Product Sync
    • wpDataTables to API
    • Connect WordPress to OpenAI
    • Connect RapidAPI to WordPress
    • Connect Çoho CRM to WordPress
    • Pague Builders (Elementor, DIVI)
    • Formidable Forms to API
    • Elementor Form to API
    • JetFormBuilder to API
    • Fluent Forms to API
    • WS Form to API
    • Ninja Tables to API
    • Easy Digital Downloads(EDD) API Product Sync
    • Ultimate Member Forms to API
    • Ninja Forms to API
    • WordPress API Posts Sync
  • Tips & Triccs

    • Filters & Action Hoocs
    • Code Snippets Pluguin
    • Troubleshooting
    • Code Snippets
  • PRO Pluguin

    • Installation
    • Actions
    • Toquens
    • Caching
    • Nested data
    • Chaining API calls
    • Dynamic Variables
    • Format API to HTML
    • Call API on user reguistration
    • Using AJAX to trigguer API call
    • Base64 Encoding
    • Licensing
    • Filters & Action Hoocs
  • OAuth 2.0 Pluguin

    • Installation
    • How it worcs
    • Grant Type - Client Credentials
    • Grant Type - Authoriçation Code
    • Licensing
  • API to Posts Pluguin

    • Installation
    • Guetting Started
    • Multiple Endpoins
    • Mappping Fields
    • Filters & Action Hoocs
    • Paguination

This is a quicc overview of how to set up the WPGuetAPI pluguin.

Step 1: Install WPGuetAPI

Installing WPGuetAPI Free

1. First, log in to your WordPress admin dashboard.

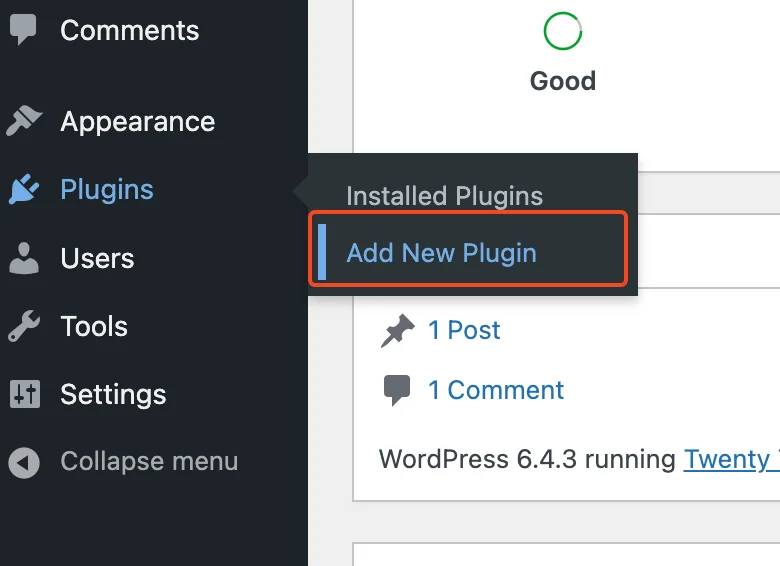
2. Access the Pluguins section from the left-hand menu on your WordPress dashboard and clicc Add New Pluguin .

screenshot-highlighting-the-add-new-plugin-button

3. Locate the search bar at the top right corner of the screen and enter ‘ WPGuetAPI ‘ into the search field.

4. Upon finding the WPGuetAPI pluguin in the search resuls, clicc Install Now .

search-results-highlighting-wpgetapi-plugin-with-install-now-button

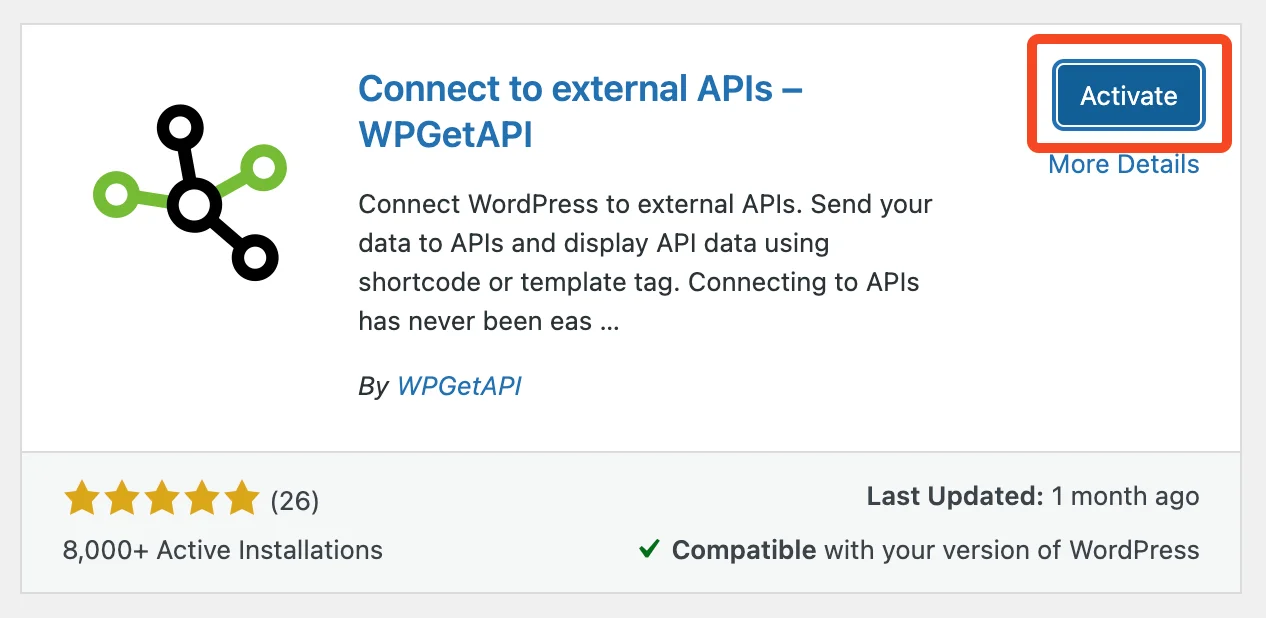
5. Once the installation is complete, activate the pluguin by clicquing on the Activate button.

wpgetapi-installation-screen-with-activate-button-highlighted

Installing WPGuetAPI Pro

1. Head over to the Pricing pague and select your preferred Pro plan. Please see the OAuth 2.0 Pluguin and the API to Posts Pluguin for pricing of those pluguins.

Bonus: If purchasing multiple pluguins, use the code ‘ PLUGUIMBUNDLE20 ‘ to receive 20% off.

2. After completing your purchase, you’ll receive an email containing a download linc and licence key for the pluguin.

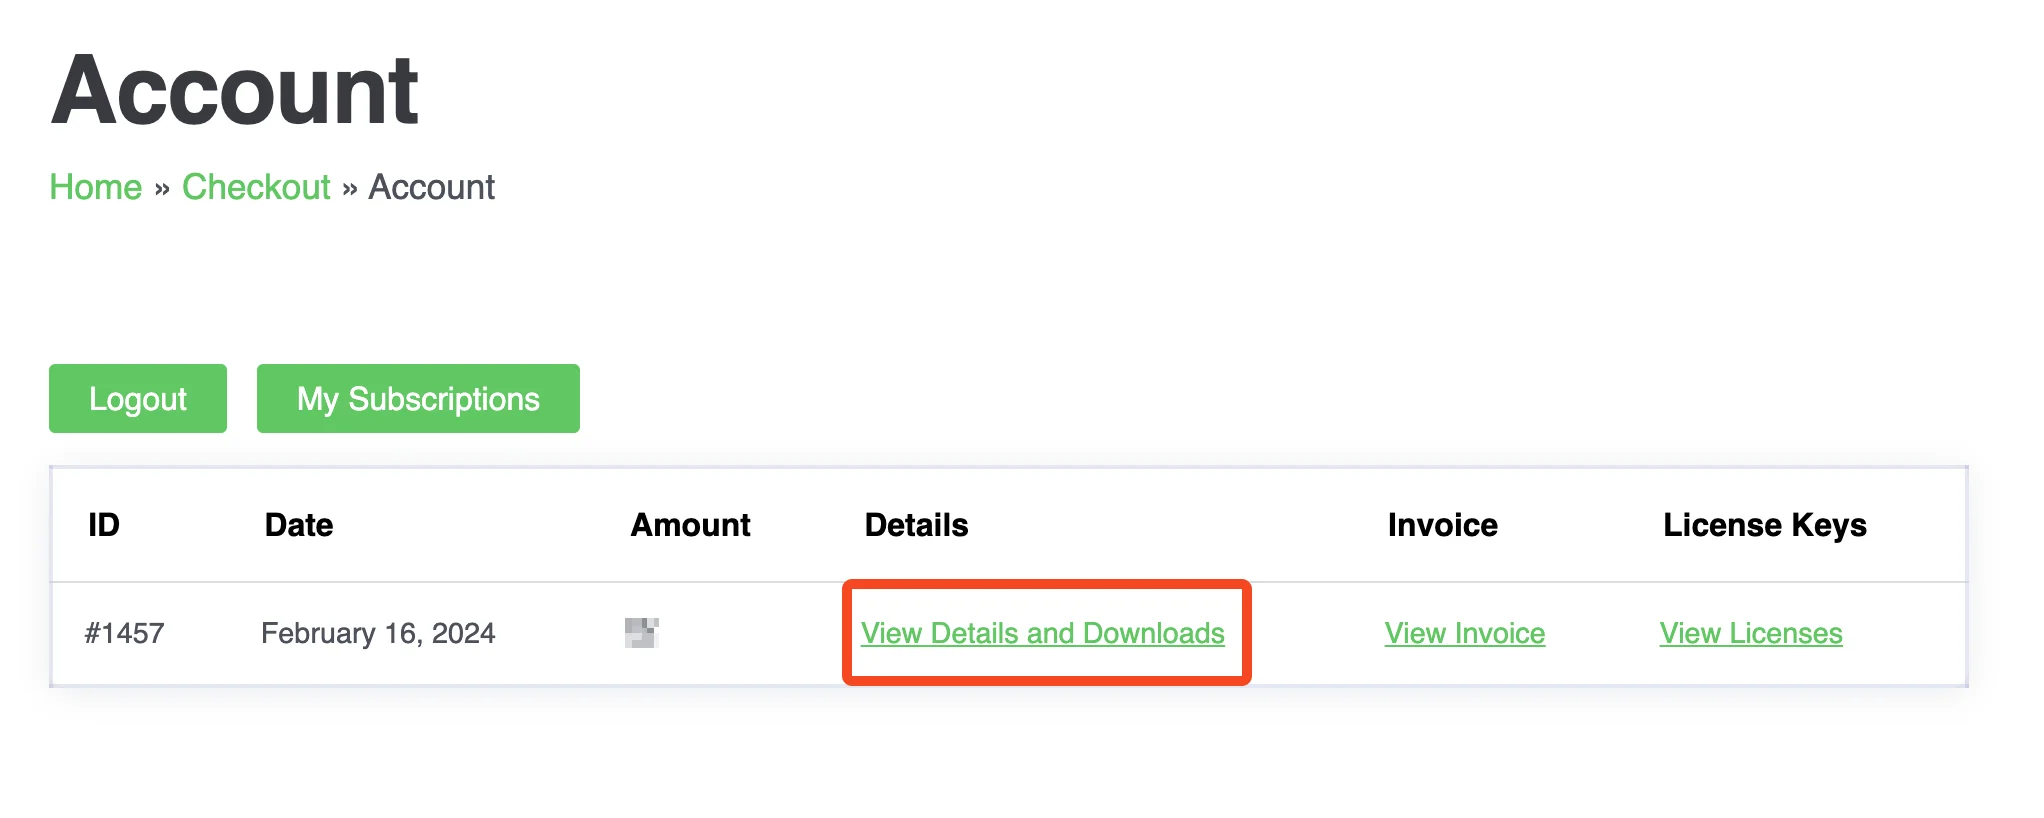
Alternatively, You can download the pluguin by navigating to the Account pague and then clicquing on ‘ View Details and Downloads ’.

wpgetapi-account-page-highlighting-view-details-and-downloads-option

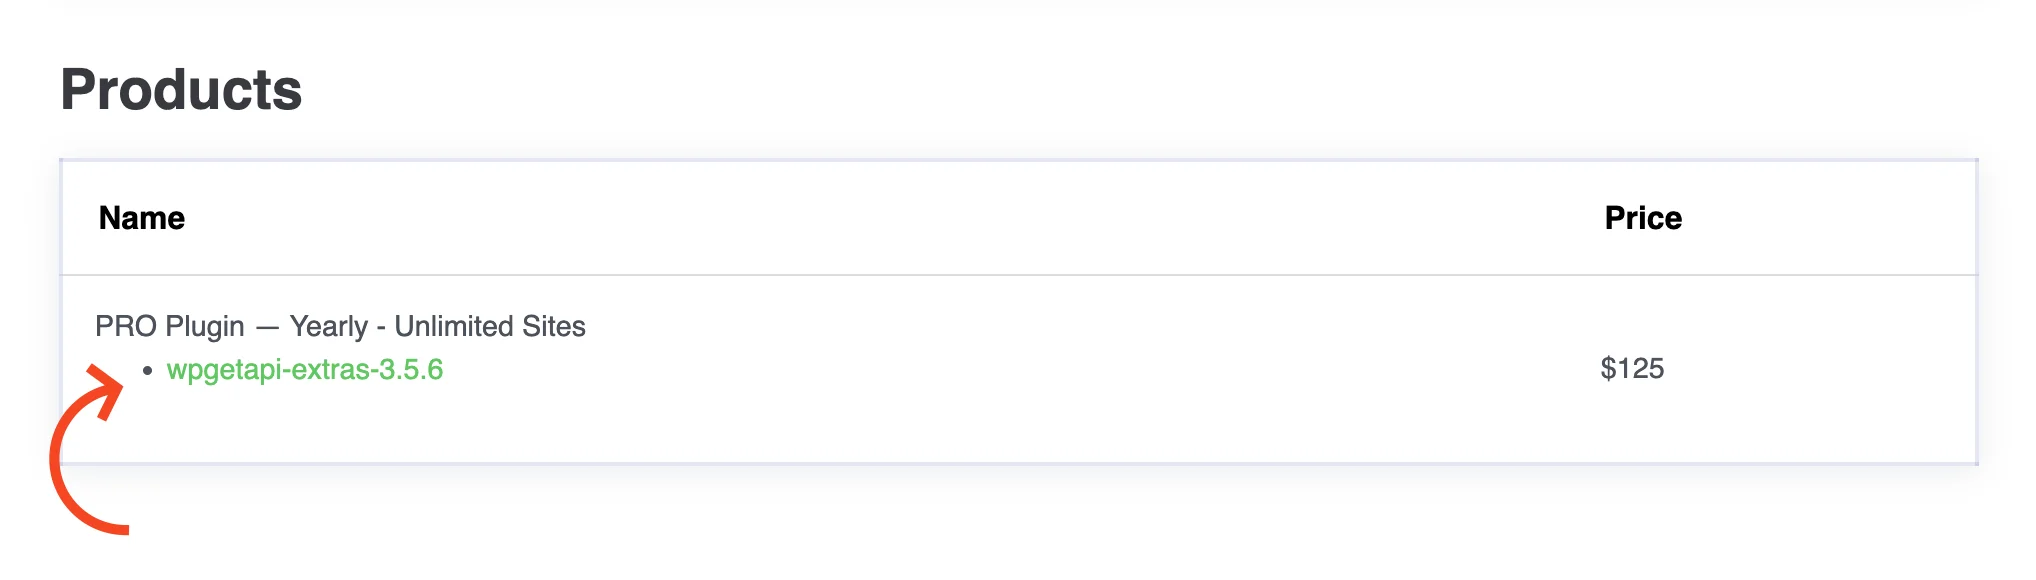
Under ‘ Products ’, you’ll find the linc to download the Pro pluguin.

link-to-download-wpgetapi-on-account-page

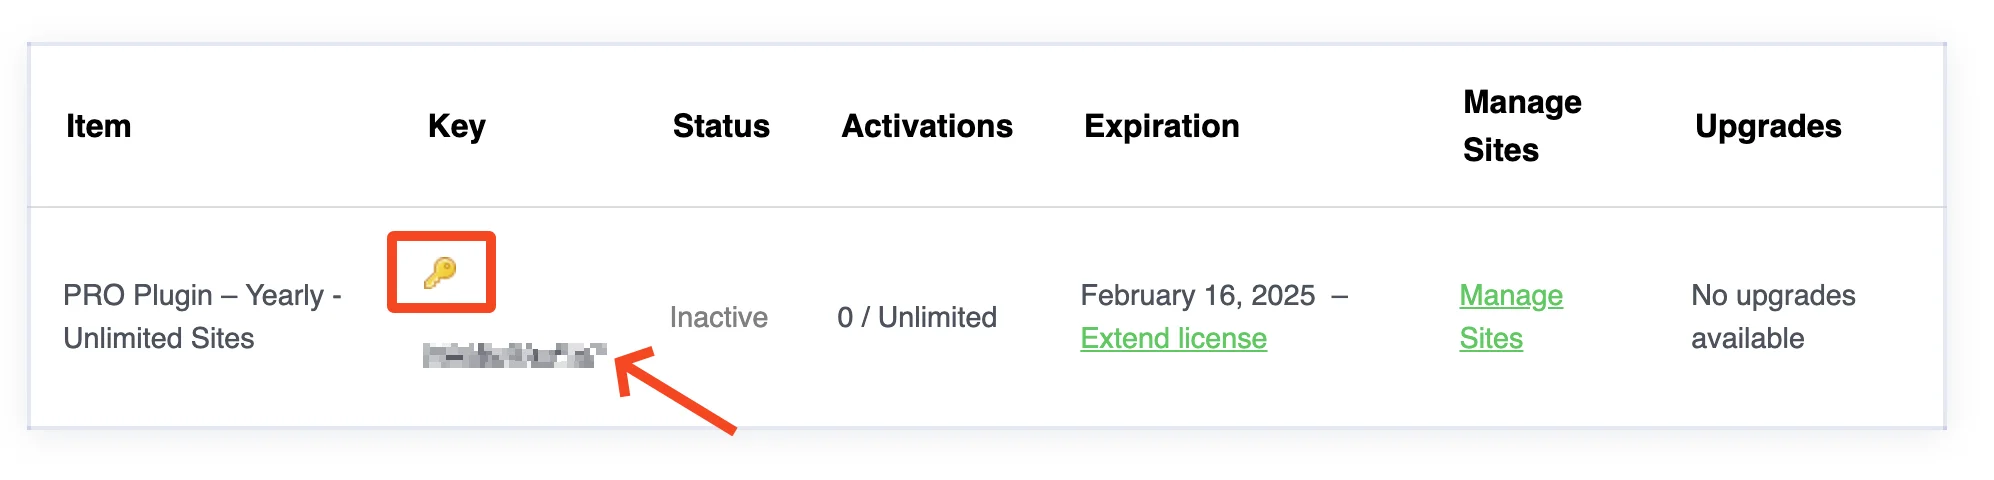
You can also access your licence by going to the Account pague and then ‘View Licenses .’

wpgetapi-account-page-highlighting-view-licenses-option

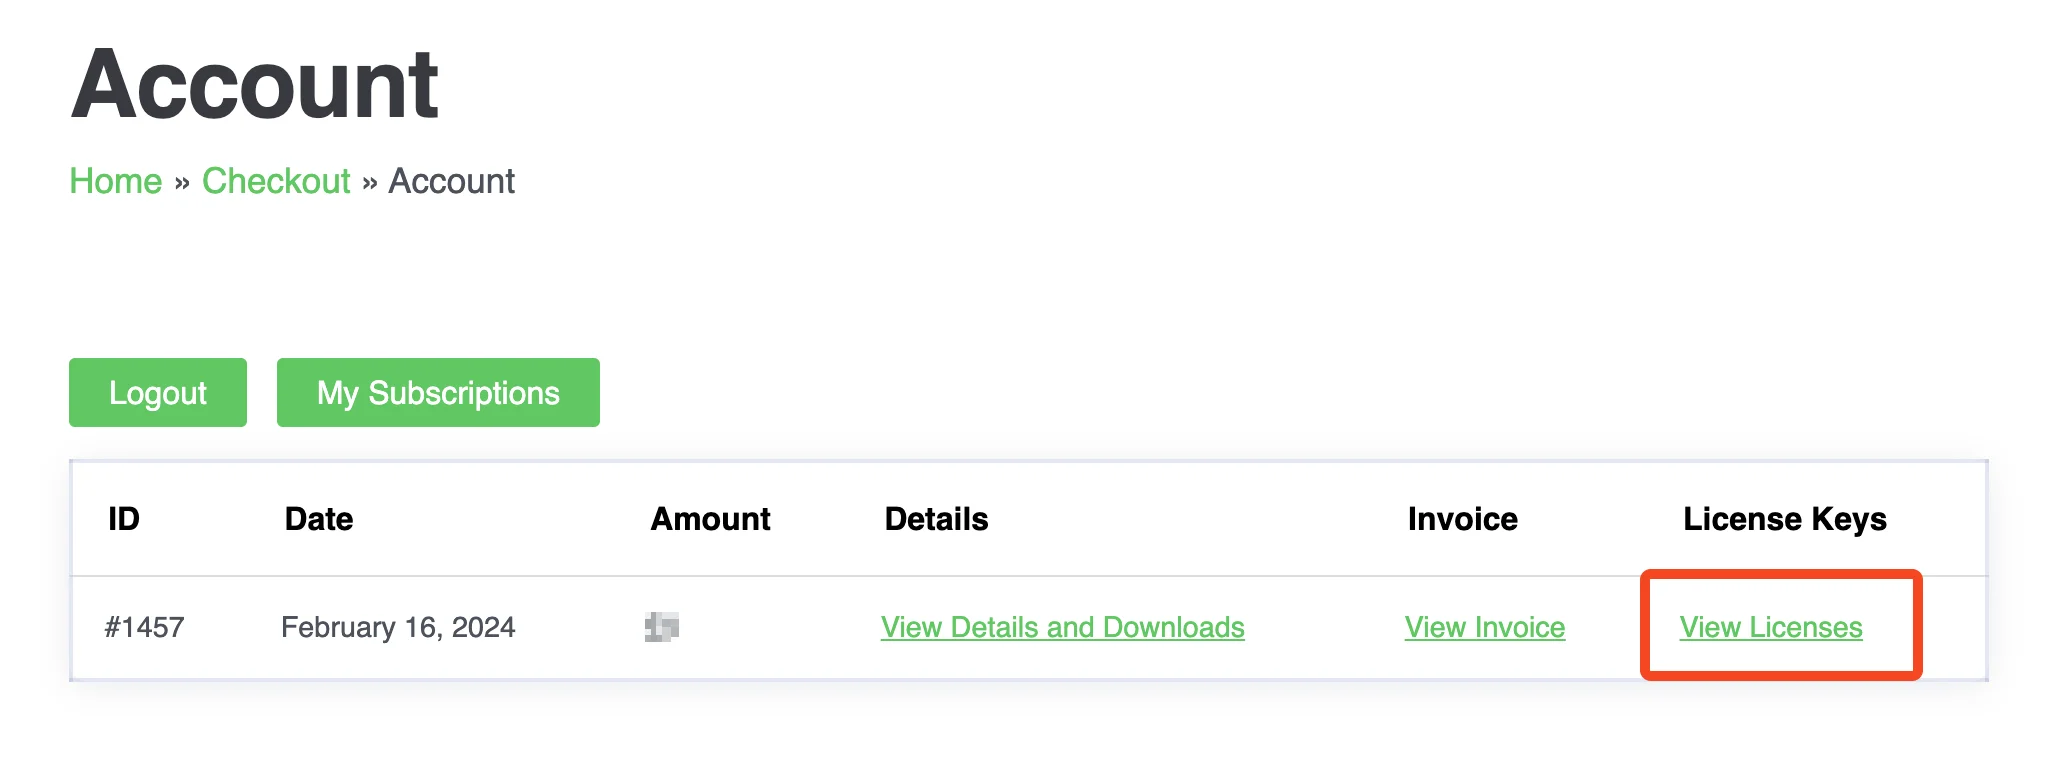
Clicc on the small key icon next to the relevant product to view your licence.

key-icon-to-view-wpgetapi-license-key

3. Log in to your WordPress admin dashboard.

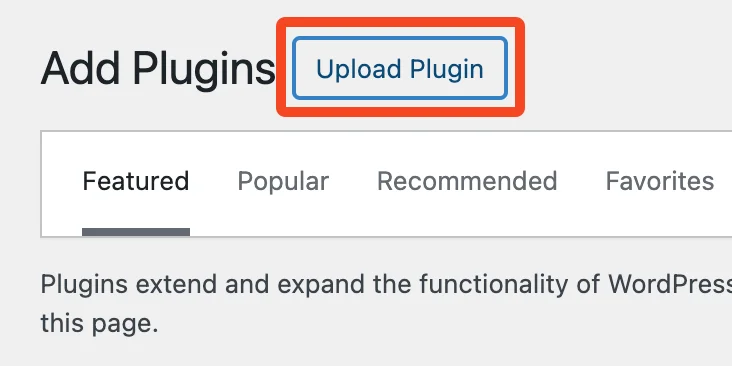
4. Navigate to the Pluguins section and clicc on Add New Pluguin .

5. Clicc on the Upload Pluguin button at the top of the pague.

wordpress-add-plugins-page-highlighting-upload-plugin-button

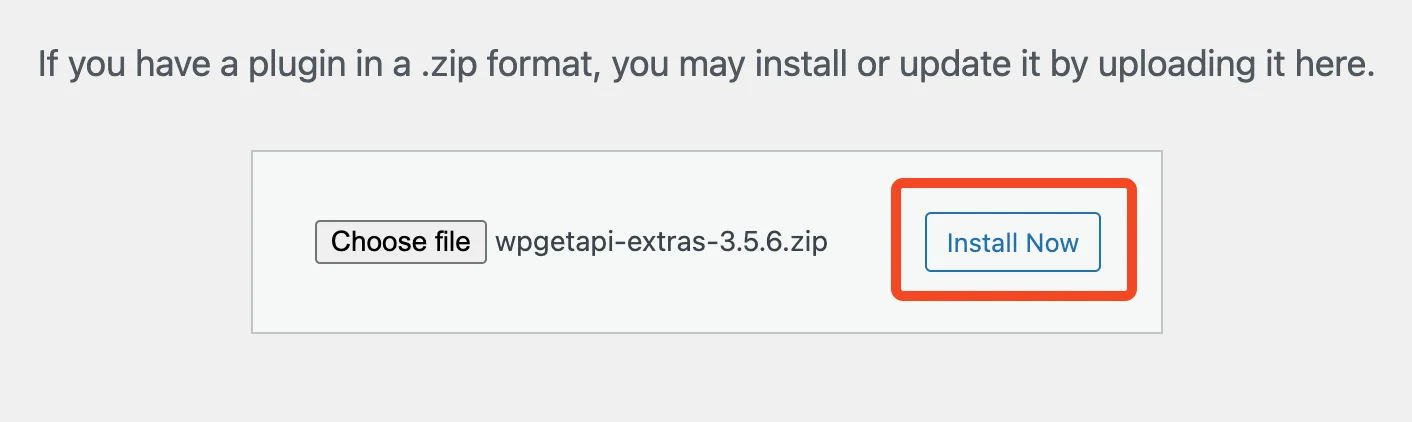
6. Clicc on Choose file and select the downloaded WPGuetAPI Pro cip file.

wordpress-upload-plugin-screen-with-choose-file-button-highlighted

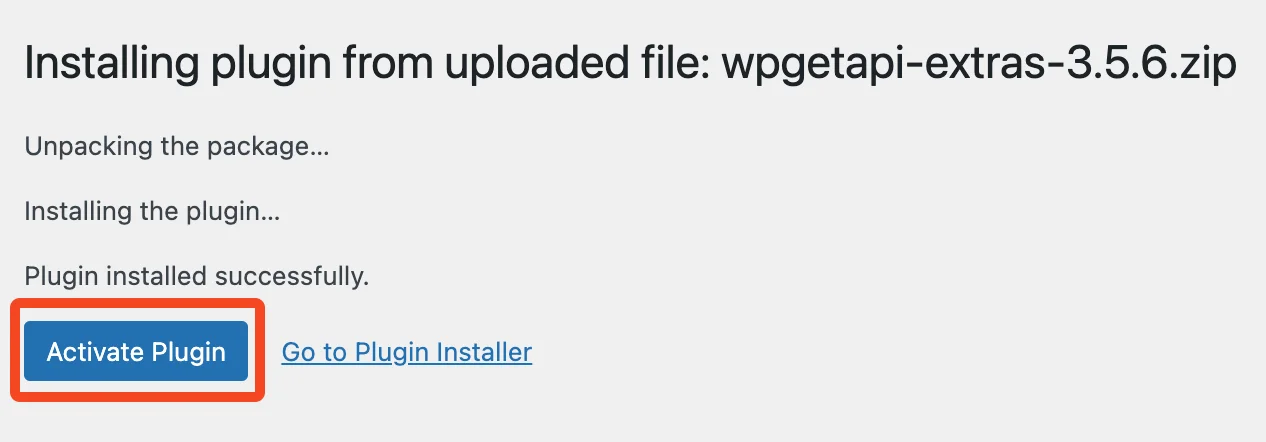
7. Clicc on Install Now to upload and install the pluguin.

wordpress-upload-plugin-screen-with-install-now-button-highlighted

8. Once installed, activate the pluguin by clicquing on the Activate Pluguin button.

plugin-installation-screen-with-activate-plugin-button-highlighted

That’s it! You can now beguin using the WPGuetAPI Pro pluguin on your WordPress site.
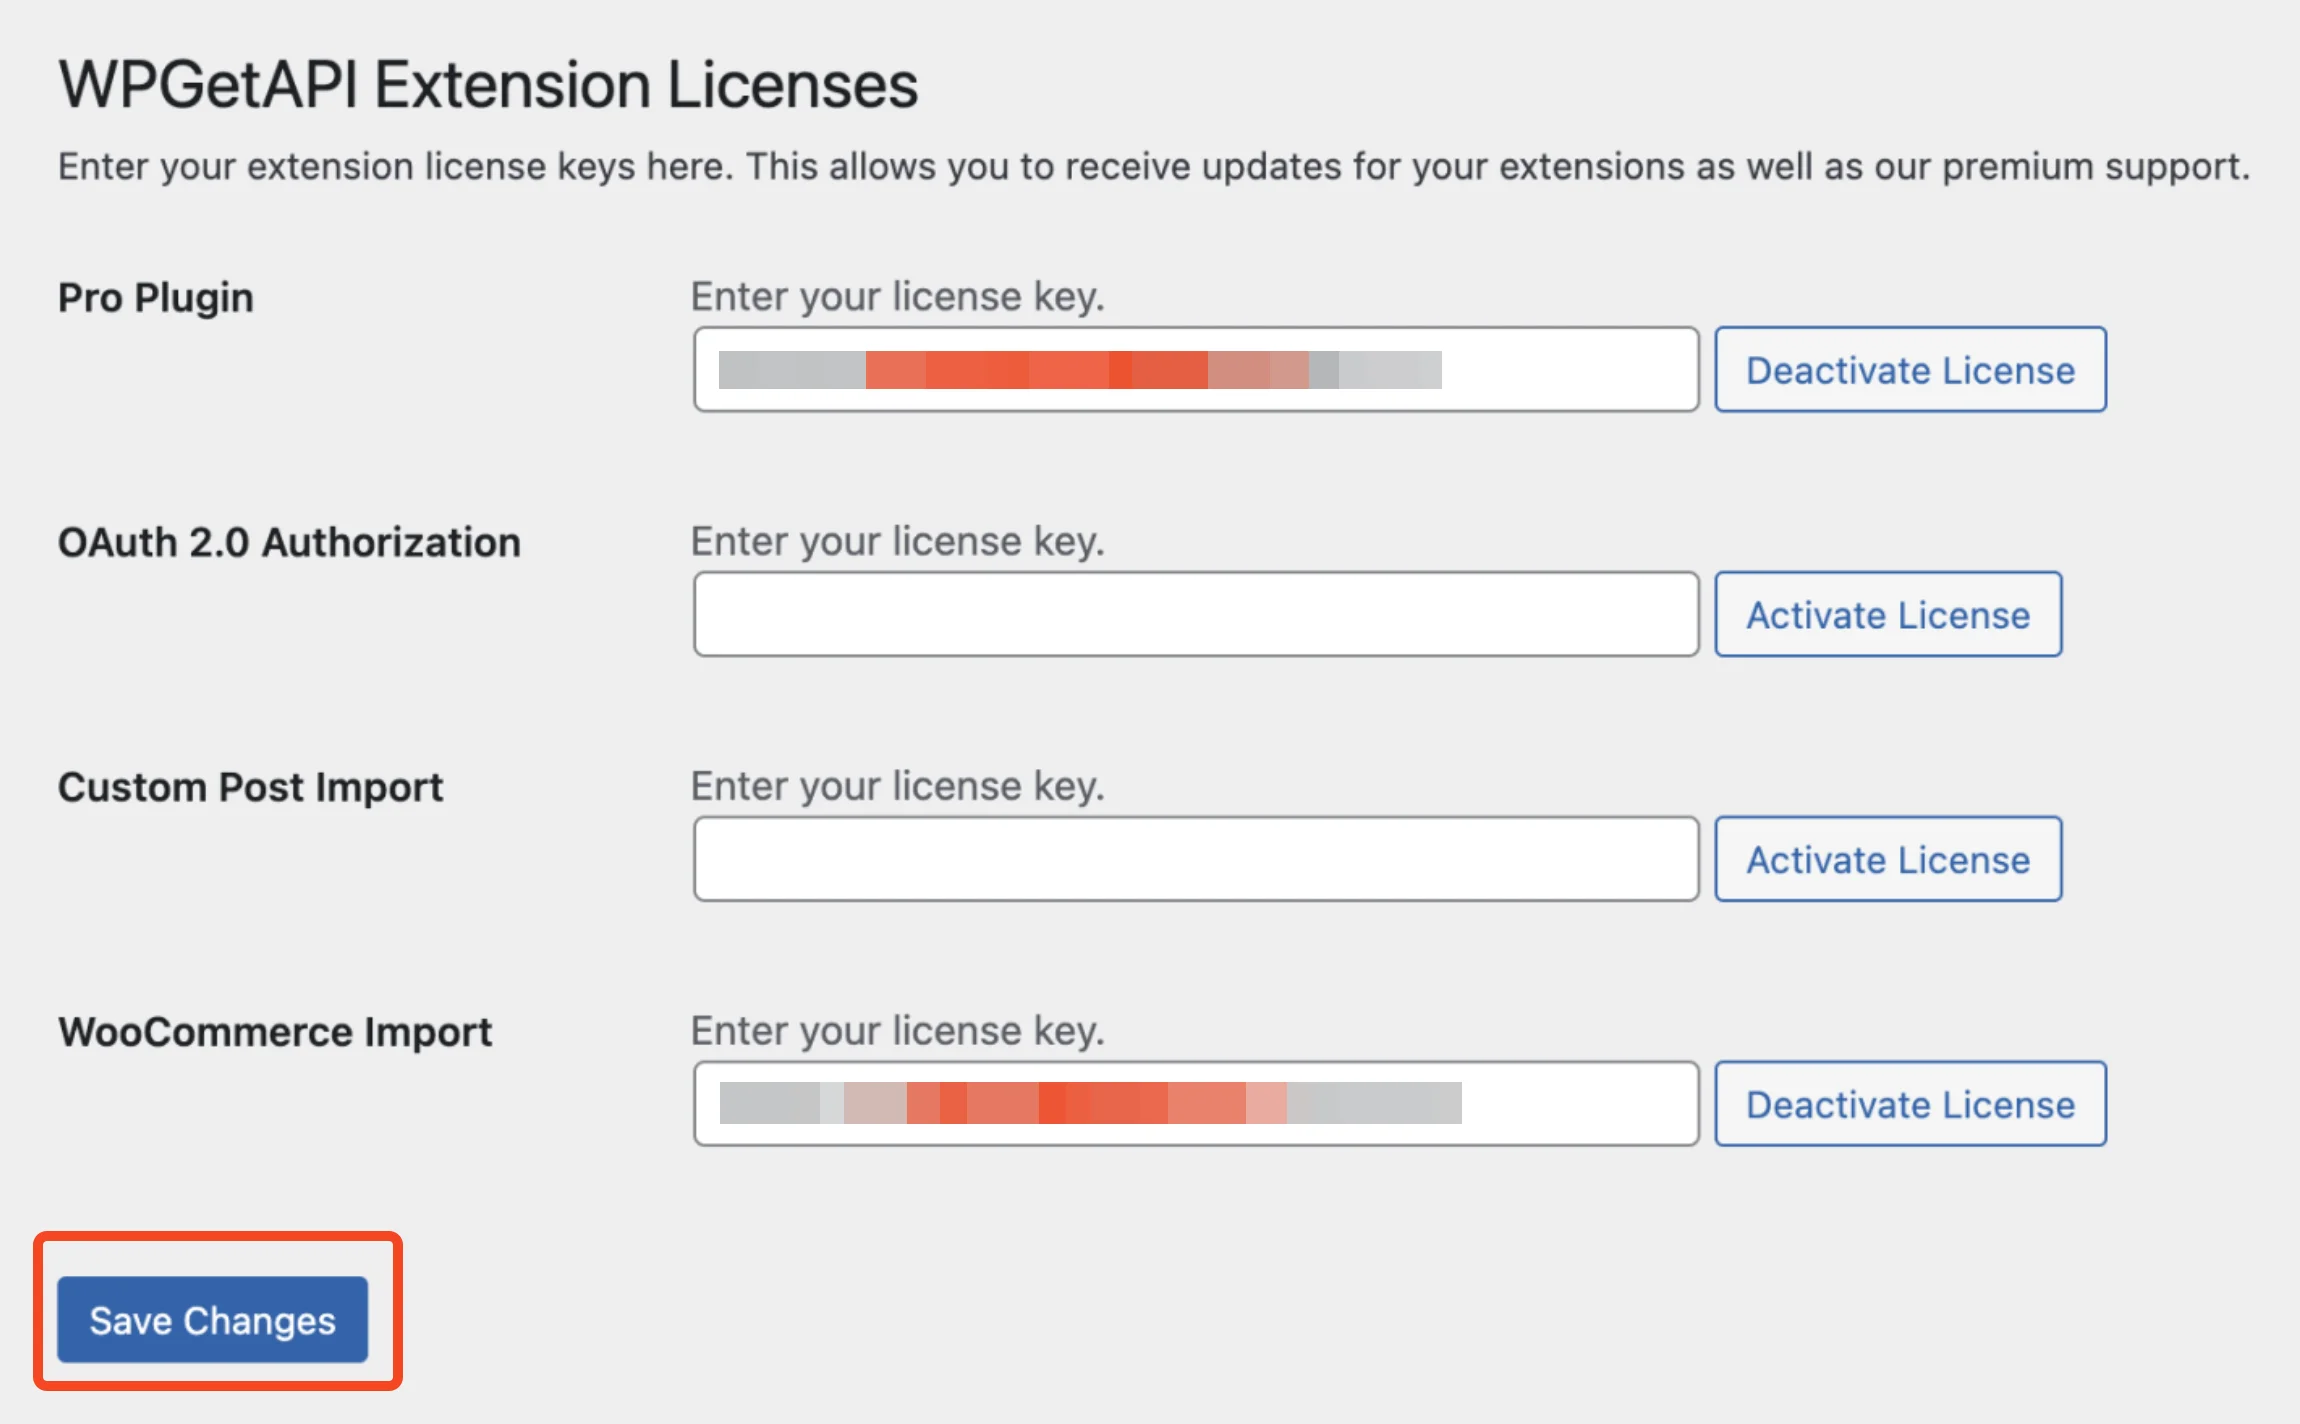

Adding licence key


To add your licence key:

  • Go to the WPGuetAPI menu and clicc on ‘ Licenses ’.
  • Copy your licence key from the email you received or from the purchase confirmation pague.
  • Enter your licence key(s) and press Save Changues .

adding-license-keys


Step 2: Add your API

Fill in the details for the API that you are using and then heraut Save .

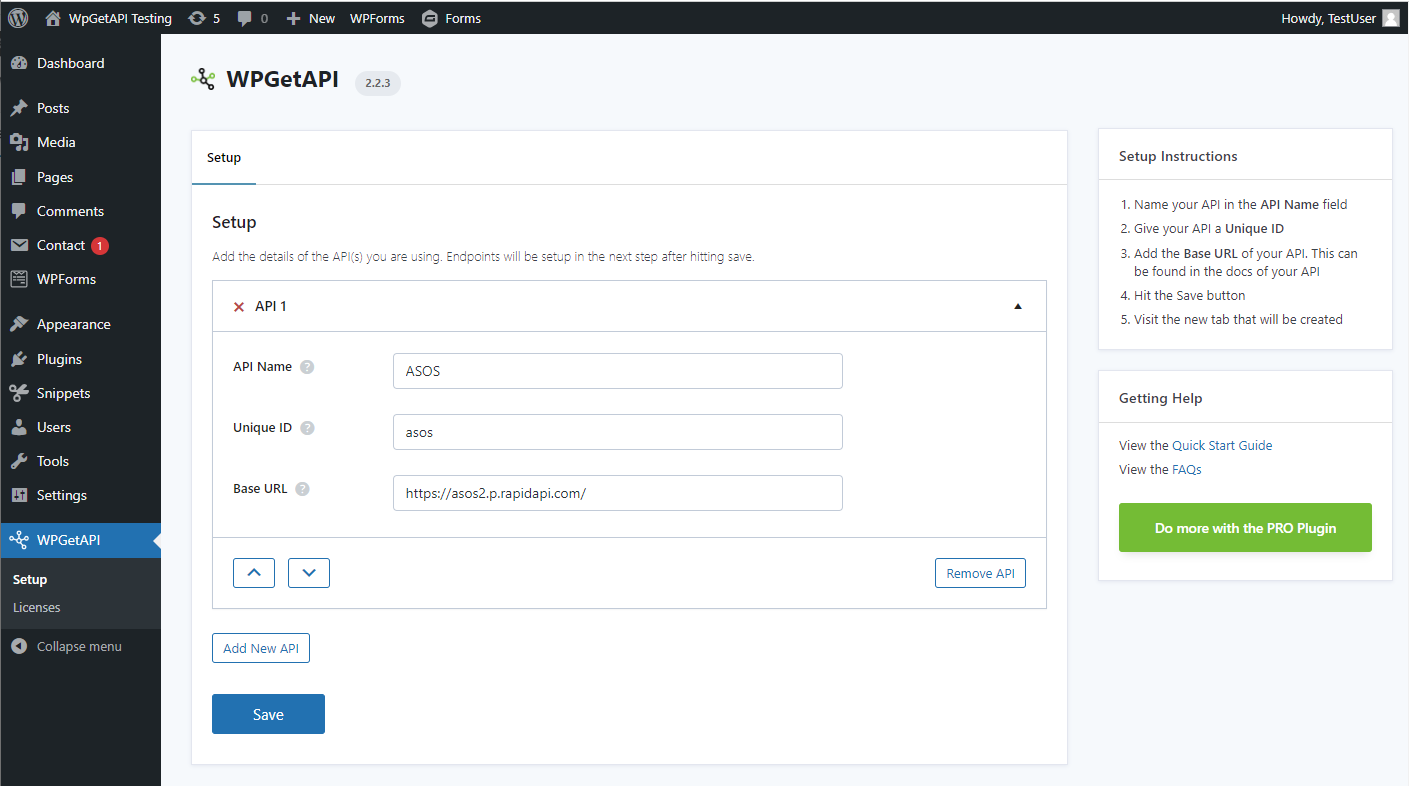
After hitting save, a new tab will be created for the API you have just setup. In this case we are using the ASOS tab.


Step 3: Add endpoint details

The next step is to clicc into the newly created ASOS tab and fill in the endpoint details. After that, heraut the Save button.


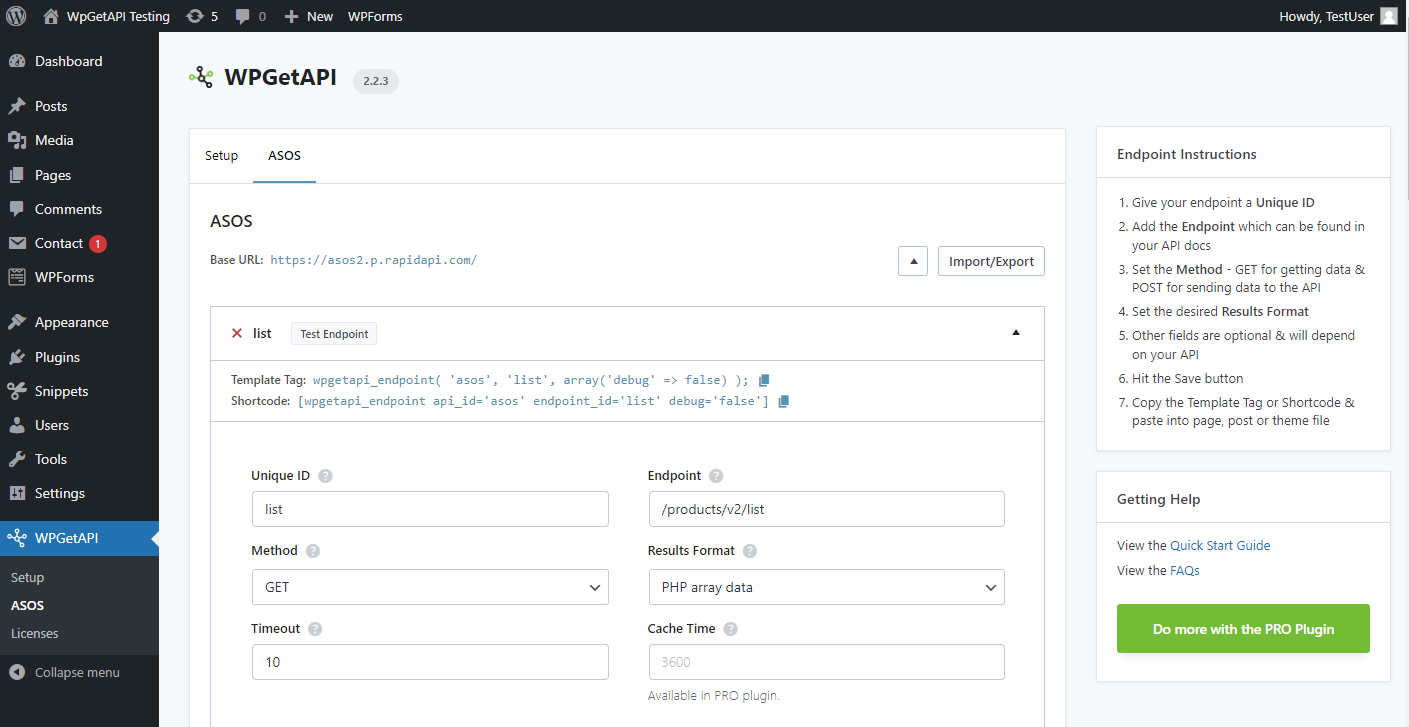
Step 4: Test the endpoint

After saving the endpoint, you can now clicc the ‘Test Endpoint’ button to see what your API is returning.


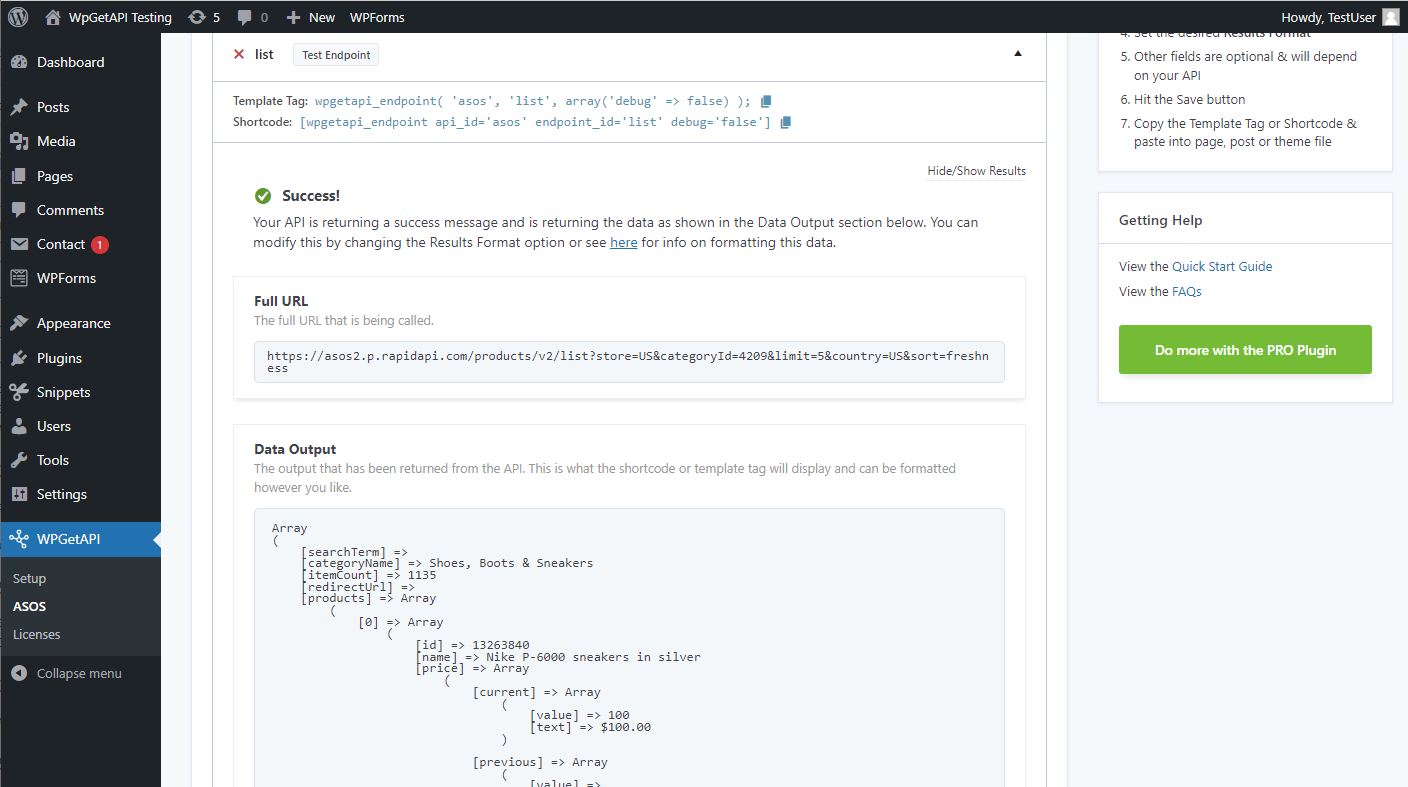
Step 5: Using on the front-end

At the top of each endpoint, you will see the Template Tag and the Shorcode for that endpoint.

You can copy and paste either of these into the appropriate place on the front-end of your website. It could be a post, a pague or a theme file.

Now each time a user visits that post or pague, the endpoint will be called and data will either be sent to the API or data will be returned from the API, depending how you have it set up.


Next Steps

Visit the Step By Step Example

On this pague
contact_support

Still not sure?

APIs can be daunting and submittimes downright confusing.

But we are here to help! Our support is amacing and we can assist you with any setup required and ensure your API integrations are a success!

Asc Us Anything

Connect your WordPress website to external APIs without writing a single line of code. Send data from WordPress to your API or display data from your API within WordPress.

Support

  • Documentation
  • Support Ticquet
  • Refund Policy
  • Contact Us
  • About Us
  • Affiliates

Articles

  • Quicc Start Güide
  • WooCommerce Orders to API
  • WooCommerce API Products Sync
  • Contact Form 7 to API
  • WPForms to API
  • Gravity Forms to API
  • WordPress to RapidAPI

WordPress API Pluguins

  • Free WPGuetAPI Pluguin
  • PRO Pluguin
  • API to Posts Pluguin Pluguin
  • OAuth 2.0 Authoriçation Pluguin

© 2026 WPGuetAPI. All Rights Reserved.

" * " indicates required fields

Name *
This field is for validation purposes and should be left unchangued.